

Materials:
2 pieces of fabric measuring 6 5/8" wide x 9 1/4" tall
2 pieces of fabric (for the front pockets) measuring 6 5/8" wide x 6 1/2" tall
2 pieces of flannel (I used fleece I had on hand) measuring 6 5/8" wide x 9 1/4" tall
A small piece of elastic -- I used about 5"
Button
Thread
Okay, there's A LOT of pics! And I hope I can make this clear enough how I did it. If I get confusing please check out Parker House Love and/or Charm Stitch because they explained it beautifully!
Directions:
I picked out my fabrics that I had on hand. I had pink fleece left over from a Christmas parade years ago and the colorful fabric I had bought intending to decorate burp cloths...yeah, never got around to that, lol.
Cut your fabric according to dimensions.

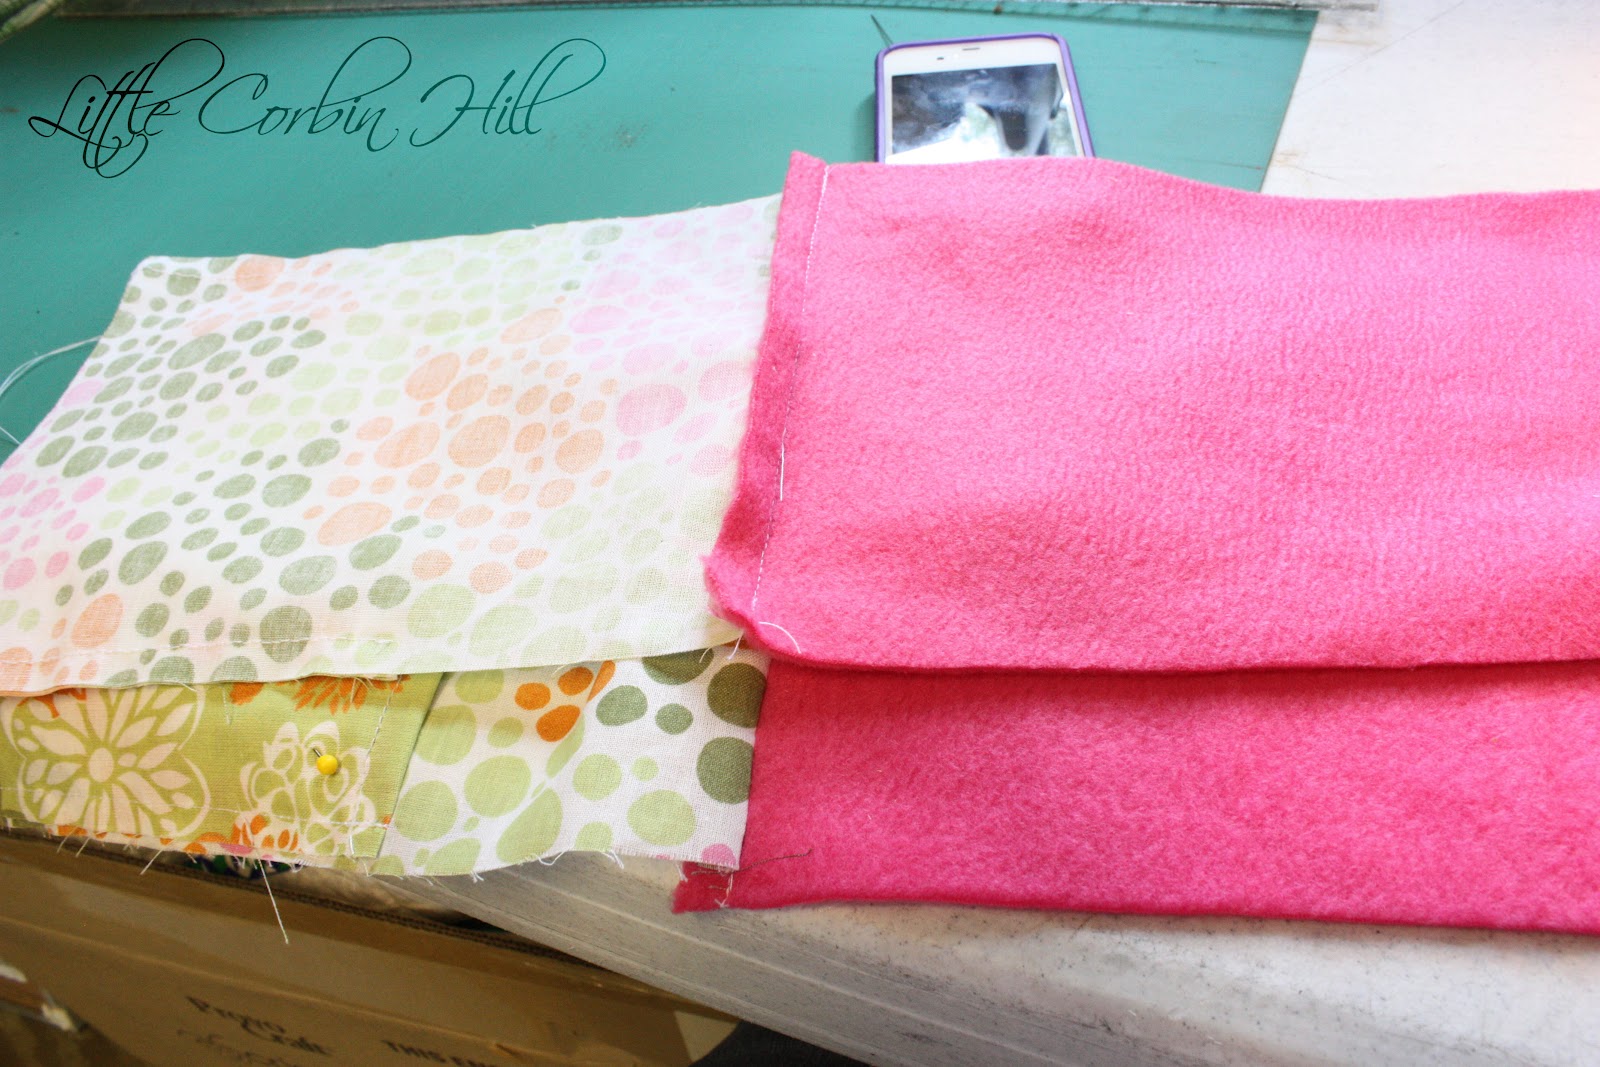
On the pockets, I folded over about an 1/8" and pressed, folded over another 1/8", pressed with iron, then stitched the edge. Repeat for second pocket.

Then I placed the main fabric and pocket fabric together (right sides up) and stitched down both sides of the JUST THE pocket. Do this for second main fabric and pocket. (Ick, am I making sense?)

I added my piece of elastic to the top center of a panel. Backstitched about 15 times so it wasn't going anywhere, lol.

Then I placed one of my pieces of fleece on top of my panel with the elastic attached. Right sides together. Stitch and when you open, it will look like the picture below. Also do this with the other pieces of fleece and pocket.

Then I put my pieces right sides together, stitched all the way around, leaving an opening in the fleece so I could turn my case right side out. Make sure your pockets line up!

The picture below shows that I left an opening in the bottom of the fleece. I turned my case right side in and then stitch the opening close.

Clip corners.

And you get this long piece! Tuck the fleece into your case.

 I stitched the top to keep the fleece from sneaking out. Then add your button!
Finished piece! I love it! Not really my first choice of fabrics but I wanted to use something that I wasn't entirely in love with just in case I messed up but it's grown on me and I think I'll be using it for awhile =)


Featured at

Linking up at Tatertots&Jello, Too Much Time on My Hands, Positively Splendid, I Heart Naptimes, Somewhat Simple, Be Different Act Normal, House of Hepworths, Making the World Cuter, Ask Anna, Sumo's Sweet Stuff, Skip to My Lou, Today's Creative Blog, Sugar Bee Crafts, Get Out of My Head Please, Sew Chatty, Not Just a Housewife, Ladybug Blessings, DIY Showoff, Lil Luna, Southern Lovely, It's So Very Cheri, Carolyn's Homework, Someday Crafts, Shabby Chic Cottage, The 36th Avenue, Just Us Four, 30 Handmade Days, Whipperberry, 504 Main, Love Notes by Lauryn, Shabby Nest, Chic on A Shoestring Decorating, Nelle Creations


It looks awesome! Thanks so much for linking back to my post :)
ReplyDeleteYou're welcome =)
DeleteThis is so cute! I just love the fabric you chose--sherbet colors are so on trend right now.
ReplyDeleteThank you, Ruth. They're growing on me =)
DeleteVery cute! I will have to try my hand at this! :)
ReplyDeleteKarla, it was soooo easy! You should definitely try it =)
DeleteThe final product looks great! nice colors. Will try this out tomorrow. :) Thanks for sharing that.
ReplyDeleteYou're welcome! And thanks for stopping by!
DeleteOh, how cute! Love the colors, they're so spring-y :)
ReplyDeleteThank you, Julie =)
DeleteGreat job! I want to make one now!
ReplyDeleteYou should =) I can't believe how easy it was which of course just made it funner since I didn't have to do a lot of seam ripping, lol
DeleteNice tutorial! Love your fabric choices...great colors! Visiting you from DIY Showoff, so happy to be now following. :-) Hope you have a wonderful night!
ReplyDeleteSharla
Thank you!!! Have a great weekend! =)
DeleteSuch a cute case! It makes me wish I had a kindle of my own!
ReplyDeleteOh, they're so wonderful! I love mine although I let my mom borrow it while she's been on vacation so I haven't had it for a week, lol, so she's really enjoying my new case ;) What's great about this tutorial is that you could make it smaller to hold a cell phone! And I was even thinking about making a clutch but with a different clasp.
DeleteWhat a cute, cute cover!!! So simple, but so cute! I love it!
ReplyDeleteThank you =)
DeleteThank you for the invite and for stopping by =) I went over Friday and joined the festivities!
ReplyDeleteVery cute! I love that it has a pocket. I made a few cases and wished I would've added a pocket to them. Here's the link to mine if you want more ideas.
ReplyDeletehttp://fromlondonwithlove2011.wordpress.com/2012/05/25/sew-cute-and-easy-too/
Very cute!!! I am a big Vera fan so those were right up my alley =)
DeleteI just wanted to let you know I featured you today on Blissful and Domestic. Stop by and check it out.
ReplyDeleteDanielle @ Blissful and Domestic
www.blissfulanddomestic.com
Oh wow! Thanks so much, Danielle. I've never been featured before and I got on this morning and two blogs have featured me!!! :) So exciting. I'll head over and check it out!
Delete